


Table of contents
You’re not designing for a box on a chest but for the entire garment. If you’re learning how to make custom all-over print shirts, you need to think in continuous designs, full coverage, and production constraints from day one.
We’ll break down the process into clear steps, from concept to finished full-print shirts – eye-catching and appreciated by customers all over the world.
What is all-over printing, and how is it different from standard t-shirts?

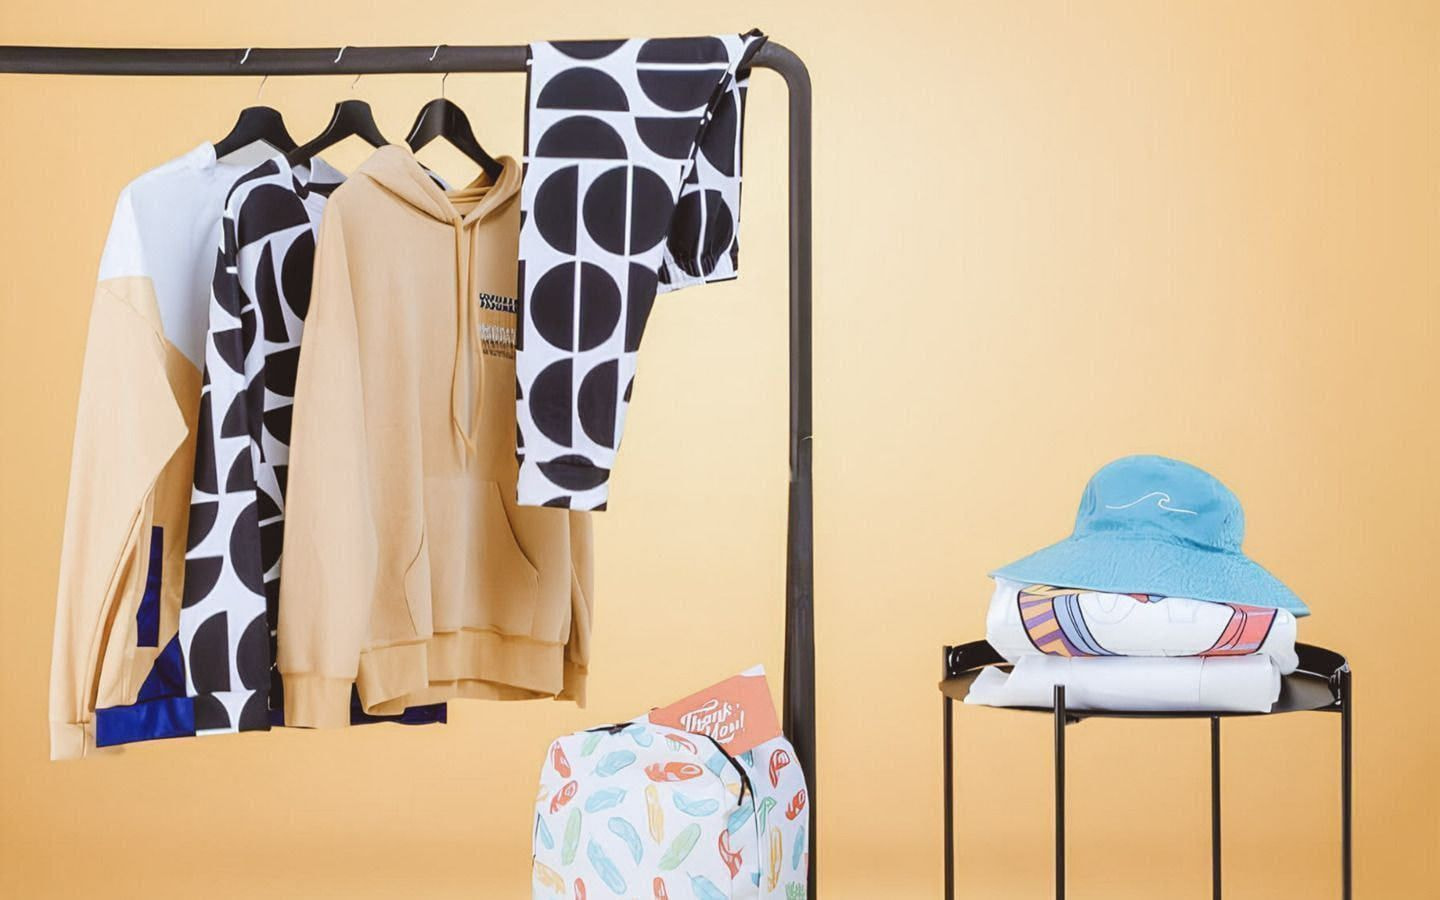
All-over print (AOP) covers the entire surface of a shirt, including the front, back, and sleeves. A standard t-shirt limits your design to a specific print area – usually the chest or back. This gives merchants, artists, and growing fashion brands more room to create eye-catching apparel with patterns, photos, graphics, and full-coverage artwork.
Understanding the dye sublimation process
Most all-over print shirts are made using sublimation printing, also known as dye-sublimation. First, your artwork is printed onto transfer paper using inks certified under OEKO-TEX® ECO PASSPORT. Then, we use heat and pressure to transfer the ink onto polyester-based fabric.
The ink becomes part of the fabric fibers instead of sitting on top, creating durable prints that resist cracking, peeling, and heavy surface texture.
For custom all-over print apparel, that means nicer coverage across the whole shirt and stronger color performance than many standard print methods. For cotton-rich products, Printful uses a different process – All-Over Cotton – covered in the fabric section below.
The pros and cons of AOP vs direct-to-garment (DTG) printing
Direct-to-garment printing technique, or DTG, works well when you want to make your own shirt with a design on a specific area, like the chest or back. All-over print works better when your design needs full coverage across the entire product.
All-over print is an excellent way to maximize design space – built for seamless patterns, large graphics, and bold visual concepts. It also suits complex designs with repeat motifs, abstract visuals, photography, or sportswear layouts.
The trade-off is construction. All-over print shirts use printed panels sewn together, so exact alignment across seams, armpits, and the collar can shift slightly. Dark backgrounds can also show visible white streaks when the fabric stretches.
Use the all-over printing technique when your concept depends on full coverage. Use DTG to customize t-shirts when your design works best in one focused print area.
|
All-over print |
DTG |
|
|
Covers the whole shirt |
Yes |
No |
|
Supports seamless patterns and full layouts |
Yes |
No |
|
Works for large graphics and photography |
Yes |
Limited |
|
Suitable for complex designs across panels |
Yes |
No |
|
Precise alignment across seams |
No |
Yes |
|
Risk of visible white streaks on stretch |
Yes |
No |
|
Best for designs in a specific area |
No |
Yes |
|
Ideal for classic custom t-shirt printing |
No |
Yes |

How to make an all-over print shirt in 4 steps
Create custom all-over (sublimation) shirts and other clothing and accessories through Printful – no equipment, no inventory, and no minimum order quantity. Make just one item or print shirts in hundreds for your business – whatever you need.
Most of the work happens before production: choosing the right product, preparing your artwork, and reviewing the final mockup.
Step 1: Create your Printful account and connect your store

Source: Printful
Sign up for a free Printful account, then connect your eCommerce store so orders move from your storefront to Printful automatically.
Printful integrates with 22 major eCommerce platforms and marketplaces, so you can manage products, orders, and fulfillment from one place.
Once you’re connected, publish your custom shirts, receive customer orders, and Printful will handle production and shipping.
Add your billing method before launch – it keeps fulfillment moving from the first sale and avoids delays for your customers.
Step 2: Choose the right AOP product for your design
Product choice shapes the final print of your custom designs, fabric feel, and customer experience. Printful offers two main AOP directions: All-Over Synthetic and All-Over Cotton.
Both use a cut-and-sew process, where the design gets printed on fabric panels before the final garment is assembled. The printing methods differ by fabric type.
Here’s how to choose:
-
All-Over Synthetic – Best for sportswear, jerseys, activewear, and bold color-heavy designs. Polyester-based fabric works well with sublimation printing, which creates sharp detail and vibrant colors across the entire garment. Many synthetic options include stretch blends with elastane for better fit and movement.
-
All-Over Cotton – Best for lifestyle apparel, streetwear, artist merch, hoodies, dresses, and customers who prefer a softer, breathable feel. All-Over Cotton uses a direct-to-fabric process designed for natural fibers, giving the product a natural matte finish and texture while still supporting full-coverage AOP layouts.
For jerseys, uniforms, and team merch where logos, names, and numbers need predictable placement, look for structured synthetic options in Printful’s Catalog – they give you more control over where key elements land.
Before you design, check the product page for fabric composition, fit, available sizes, size chart, and print file requirements. These will tell you how the artwork behaves once it’s printed, cut, sewn, washed, and worn.
Step 3: Upload and position your artwork in the Design Maker
Printful’s Design Maker lets you place artwork across the product template. Upload your design file, adjust the scale, and review each view carefully. For AOP, check the front, back, sleeves, collar, and edges – each panel affects the finished shirt.
-
Keep important elements – logos, faces, text, etc – away from seams. These areas move during cutting and sewing, so perfect alignment across panels isn’t guaranteed.
-
Patterns, textures, and abstract visuals usually handle these transitions better than rigid lines or centered typography.
Step 4: Review your mockups and order a sample
Mockups show you the placement on virtual clothing, but a sample shows the real thing. Order a sample – with 20% off – before you launch your new custom full-print shirt.
Use it to check:
-
Print clarity and color
-
Fabric feel and stretch
-
Fit against the size chart
-
Product quality after washing
Samples also let you take original photos for product pages, ads, and email and content marketing. Real images help potential customers understand the texture, fit, and finish far better than flat mockups.
Preparing your all-over print design for a seamless look
Strong all-over print designs depend on correct file size, resolution, and layout across the product template. Most production issues trace back to files that are too small, incorrect scaling, missing bleed, or key elements placed where alignment can shift.
Why are high-resolution files non-negotiable?
All-over print scales your image across the entire garment, so low-resolution files show pixelation, blur, and compression artifacts. That’s why it’s always best to use high-resolution images and follow the product’s file dimensions.
Check Printful’s AOP file guidelines for the recommended dimensions, format, and safe zones for custom t-shirt printing and other products.
-
PNG is the right choice when you need transparency
-
JPEG works when the artwork fills the entire print area
Simple Rule: Start with a larger, cleaner file than you think you need. Scaling down protects quality. Scaling up kills it.
How to choose between patterns, photography, and large-scale graphics
Different artwork creates different printing results.
-
Seamless patterns work well for all-over print t-shirts because they repeat naturally and handle small alignment shifts near the edges
-
Photography works best when the main subject avoids the panel edges
-
Large graphics need more planning – a misplaced line can look broken after sewing
The best designs for AOP hold up when the t-shirt moves, stretches, or folds. Dense patterns, gradients, illustrated textures, florals, geometric layouts, and abstract prints all translate well.
Use Pinterest, Etsy, Photoshop, and Canva for research, moodboards, editing, and layout building. Use them for inspiration and tools, never copy protected work.
Understanding the “bleed area” and why it matters
Bleed extends your artwork beyond the trim line. It protects the final product from unwanted white space or thin gaps near the edges after cutting and sewing.
For all-over print shirts, bleed matters more than with standard shirt printing. Your design needs to cover every panel fully, including areas that may shift slightly during production. Stop too close to the trim line, and the final shirt can show blank spaces.
-
Extend backgrounds, textures, and repeat patterns beyond the safe zone
-
Keep critical text and logos inside the recommended area
Technical tips for designing different shirt styles and fabrics

Source: Printful
Every fabric behaves differently during printing, cutting, sewing, wearing, and washing. A strong all-over print shirt layout accounts for stretch, texture, garment shape, and panel construction before production.
Designing for performance wear and athletic jerseys
Performance shirts and jerseys often use polyester and stretch blends, which suit dye sublimation. They work well for team uniforms, training gear, and event apparel because the fabric supports movement and strong color transfer.
Design with motion in mind. Place key visuals where the garment stretches less – usually away from the armpits and side edges. Use high-contrast colors for numbers, names, logos, and sponsor marks so they remain readable from a distance.
Test the layout on mockups from multiple angles before ordering your sample – athletic apparel needs to look good both on a product page and in motion.
Challenges with cotton blends and natural textures
For a long time, cotton was a real limitation for all-over print. Traditional sublimation printing – where dye is heat-transferred into fabric – only works on synthetic materials. Pure cotton can’t handle the heat, so AOP on cotton meant faded colors, inconsistent results, or compromises in feel.
Printful's All-Over Cotton changes that. It uses direct-to-fabric printing with water-based inks certified under OEKO-TEX® ECO PASSPORT, specifically designed for natural fibers. The fabric is printed before being cut and sewn, which improves seam alignment compared to the standard AOP methods. The result is a soft texture, natural matte finish, and breathable feel that customers expect from cotton apparel.
Browse Printful’s full AOP Cotton collection to see what’s available.
Still, cotton and synthetic fabrics behave differently. Ultra-fine lines, small text, and highly detailed artwork may look softer on cotton than they would on smooth polyester.
For sharp graphics, sportswear, and bold color-heavy designs, polyester-based all-over-print shirts deliver the best-quality prints.
Managing seams, armpits, and collar transitions
All-over print shirts use multiple printed panels. Small shifts can happen, though, especially around seams, armpits, sleeves, and the collar.
When designing print-on-demand AOP t-shirts, avoid wraparound layouts that depend on perfect front-to-back alignment. They can look clean in a digital preview and still shift on the finished product. Keep faces, typography, and thin lines away from panel joins.
Let solid colors and patterns carry the transition areas. That gives the final shirt a polished look without depending on pixel-perfect precision.
Common mistakes to avoid when making AOP shirts

Source: Printful
Most all-over print shirt mistakes stem from treating full-coverage apparel like a flat poster. A t-shirt moves, stretches, folds, and gets assembled from separate panels – your design needs enough flexibility to survive production with this print method.
How to prevent white streaks and “smudging” near seams?
White streaks appear when the fabric stretches, exposing unprinted fibers, especially on dark designs. This can happen near seams, underarms, and other high-stretch areas.
Reduce the risk by choosing lighter backgrounds and textured patterns, and avoiding solid dark blocks in areas that stretch heavily.
For dark artwork, add gradients or detailed patterns so any stretch marks blend into the design.
Smudging usually comes from low-quality files, poor scaling, or tiny details placed in high-movement areas. Keep small details away from stress points.
Avoiding low-contrast colors that disappear in the print
Low-contrast artwork looks flat after printing, especially viewed from a distance. Colors that look distinct on screen can look nearly identical on fabric.
-
Before uploading, switch the design preview to grayscale or lower your screen saturation. If the logo, text, or main artwork disappears into the background, the color contrast is too weak.
-
Increase the difference between light and dark areas so the design reads in thumbnails, product photos, and mobile store pages.
Strong contrast matters most for:
-
Text
-
Logos
-
Sports numbers
-
Brand marks
-
Fine-line illustrations
Troubleshooting alignment across front and back panels
Perfect front-to-back alignment isn’t guaranteed in all-over print shirt production. If your t-shirt design file uses stripes, borders, or straight lines, small shifts near side seams will stand out.
Replace hard alignment points with florals, textures, gradients, scattered icons, or abstract shapes – the eye won’t have a single line to track across the seam.
Best practices for selling your custom creations

Source: Printful
All-over print shirts usually cost more to produce than standard tees, so your product page needs to make the value obvious. Show the coverage, fabric, fit, print process, and care instructions so customers understand what they buy.
Highlighting the premium quality of all-over prints
This print method gives you more design space and a more distinctive product than a standard print t-shirt. Explain the difference in plain language in your product description.
Call out the full-coverage, fabric, sublimation printing, and cut-and-sew construction. Add close-up photos of the print, sleeves, and seams, so customers see why it costs more than a basic t-shirt.
Use lifestyle images too. Print-on-demand AOP apparel sells better when shoppers see it on a real person – not just a flat mockup.
Setting the right price point for AOP apparel
Your all-over print t-shirt price should cover product cost, shipping, marketplace/platform fees, taxes, discounts, and desired profit margins. Start with a simple formula:
Profit margin + product cost + shipping + fees = retail price
All-over print shirts often fit premium positioning – they require more material coverage, more production steps, and more careful file setup. Price them as designed apparel, not basic blanks.
If you sell to teams, companies, events, or creators, consider offering bulk order discounts. Printful has no minimum order quantity, but ordering in bulk can support better unit economics, campaign planning, team rollouts, and promotional launches.
Valuable read: How to price custom t-shirts
FAQ
Polyester or polyester-blend fabric works best for sublimation-based AOP shirts – the dye bonds with synthetic fibers, producing sharper detail, stronger color, and longer-lasting coverage. For a softer, more breathable feel, Printful’s All-Over Cotton line uses direct-to-fabric printing to achieve full coverage on cotton-rich products with a natural matte finish.
All-over print shirts can last for years with proper care because the ink bonds with the fabric. When caring for print-on-demand shirts, wash inside out with mild detergent, avoid bleach, use a gentle cycle, and tumble dry on low. If needed, use a low-heat iron inside out.
Yes, you can use any image you own or have legal rights to use. Avoid copyrighted artwork, brand logos, celebrity photos, and marketplace designs copied from other sellers. For custom t-shirt printing, original files protect your store from takedowns and help build a stronger brand.
Use a resolution of at least 150 DPI (dots per inch) for your chosen product. AOP needs large, sharp files because the artwork covers more area than standard shirt printing. Start with high-resolution PNG or JPEG files and avoid enlarging small images.
Find ideas on Pinterest, Etsy, Instagram, fashion lookbooks, sportswear collections, and pattern libraries. Look for layout logic, color direction, and product themes. Then create original artwork using Canva, Photoshop, or Printful’s Design Maker.
Conclusion: Creating designs to dye for
The rule for how to design all-over print shirts is simple: design for the product, not a flat screen.
Choose the right fabric, prepare eye-catching designs, protect key details from seams, and test samples before launching your custom t-shirt brand. Sign up to Printful to create, publish, and sell custom all-over print t-shirts – no inventory or printing machines, just amazing quality products at great prices, fulfilled and shipped quickly around the world.

Zane is a sharp-witted writer with a deep interest in eCommerce, branding, and creative entrepreneurship. With a knack for blending humor, insight, and no-nonsense advice, she crafts engaging content that helps merchants learn and businesses grow. When she’s not dissecting industry trends, she's exploring philosophy, music, and the perfect balance between solitude and connection.